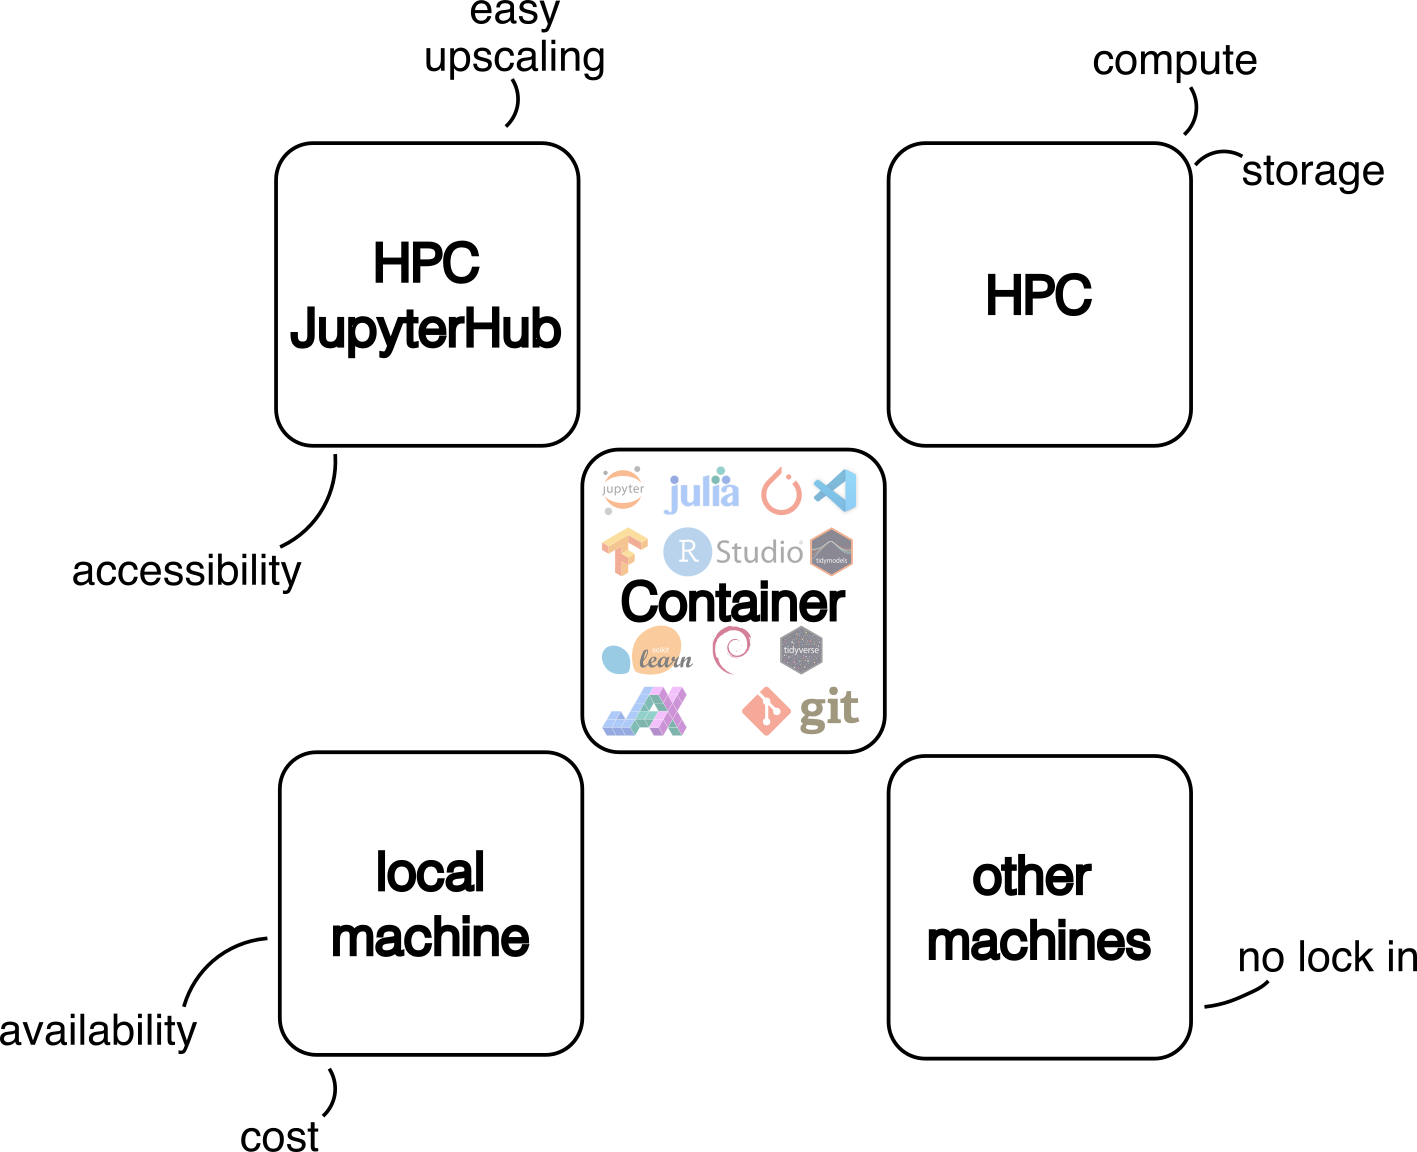
Reliable software environments are often a problem for data scientists. This becomes an issue especially when the analysis needs to be run on different machines – colleagues laptop, cloud VM or HPC cluster. Here we introduce the idea of containerised software environments in the use case of a deep learning workflow. A more general view on this has already been described in our blog post Declutter your Python environments.
A more permanent version of this article with updates and fixes can be found in our GitLab Repository.
Why? Lets ask Chat AI
What are the five most important benefits of using containers in my machine learning workflow?
- Consistency and Reproducibility: Containers ensure that your ML environment is consistent across different machines and environments, making it easier to reproduce results and collaborate with others.
- Dependency Management: Containers simplify dependency management by packaging all required libraries and dependencies within the container, eliminating version conflicts and ensuring that your ML code runs smoothly.
- Isolation and Security: Containers provide a sandboxed environment for your ML code, isolating it from the host system and preventing potential security risks, such as data breaches or malware infections.
- Portability and Flexibility: Containers are highly portable, allowing you to move your ML workloads between different environments, such as development, testing, and production, without worrying about compatibility issues.
- Efficient Resource Utilization: Containers can run multiple ML workloads on a single machine, maximizing resource utilization and reducing the need for additional hardware.
Credits: Here the self-hosted model LLaMA 3 70B Instruct was used to generate this answer. Only an excerpt of the original answer is shown here.
Building the container 🛠️
me@local-machine~ % ssh grete
[me@glogin9 ~]$ cd /path/to/deep-learning-with-gpu-cores/code/container
[me@glogin9 ~]$ bash build_dlc-dlwgpu.sh
The container can be built on our various HPC clusters using the build_dlc-*.sh scripts. Details on how to use Apptainer and the process of building containers are described in our documentation and our blog article Decluttering your Python environments. Running build_dlc-dlwgpu.sh will build an image with the software used for our workshop example, as defined in dlc-dlwgpu.def. Contrary to the traditional way of using conda to install all packages defined in a requirements.txt file, pip is used here to reduce the number of software packages used. However, there are good reasons to use conda, so build_dlc-conda-example.sh shows a minimal example of installing Python packages in a container using conda (see dlc-conda-example.def).
If you encounter errors while building the container, have a look at build_dlc-dlwgpu.log or build_dlc-conda-example.log. You can also use cat (in a different terminal) to see the progress of the image building process.
The image can now be used on our JupyterHub service or via the command line on our HPC systems. We recommend using JupyterHub for the initial phase of a project to set up the workflow and for data exploration. Compute-intensive workloads, such as model training, should be run on the HPC cluster using SLURM. This allows users to execute computational jobs in a very flexible and customisable way, making the best use of the available computing resources.
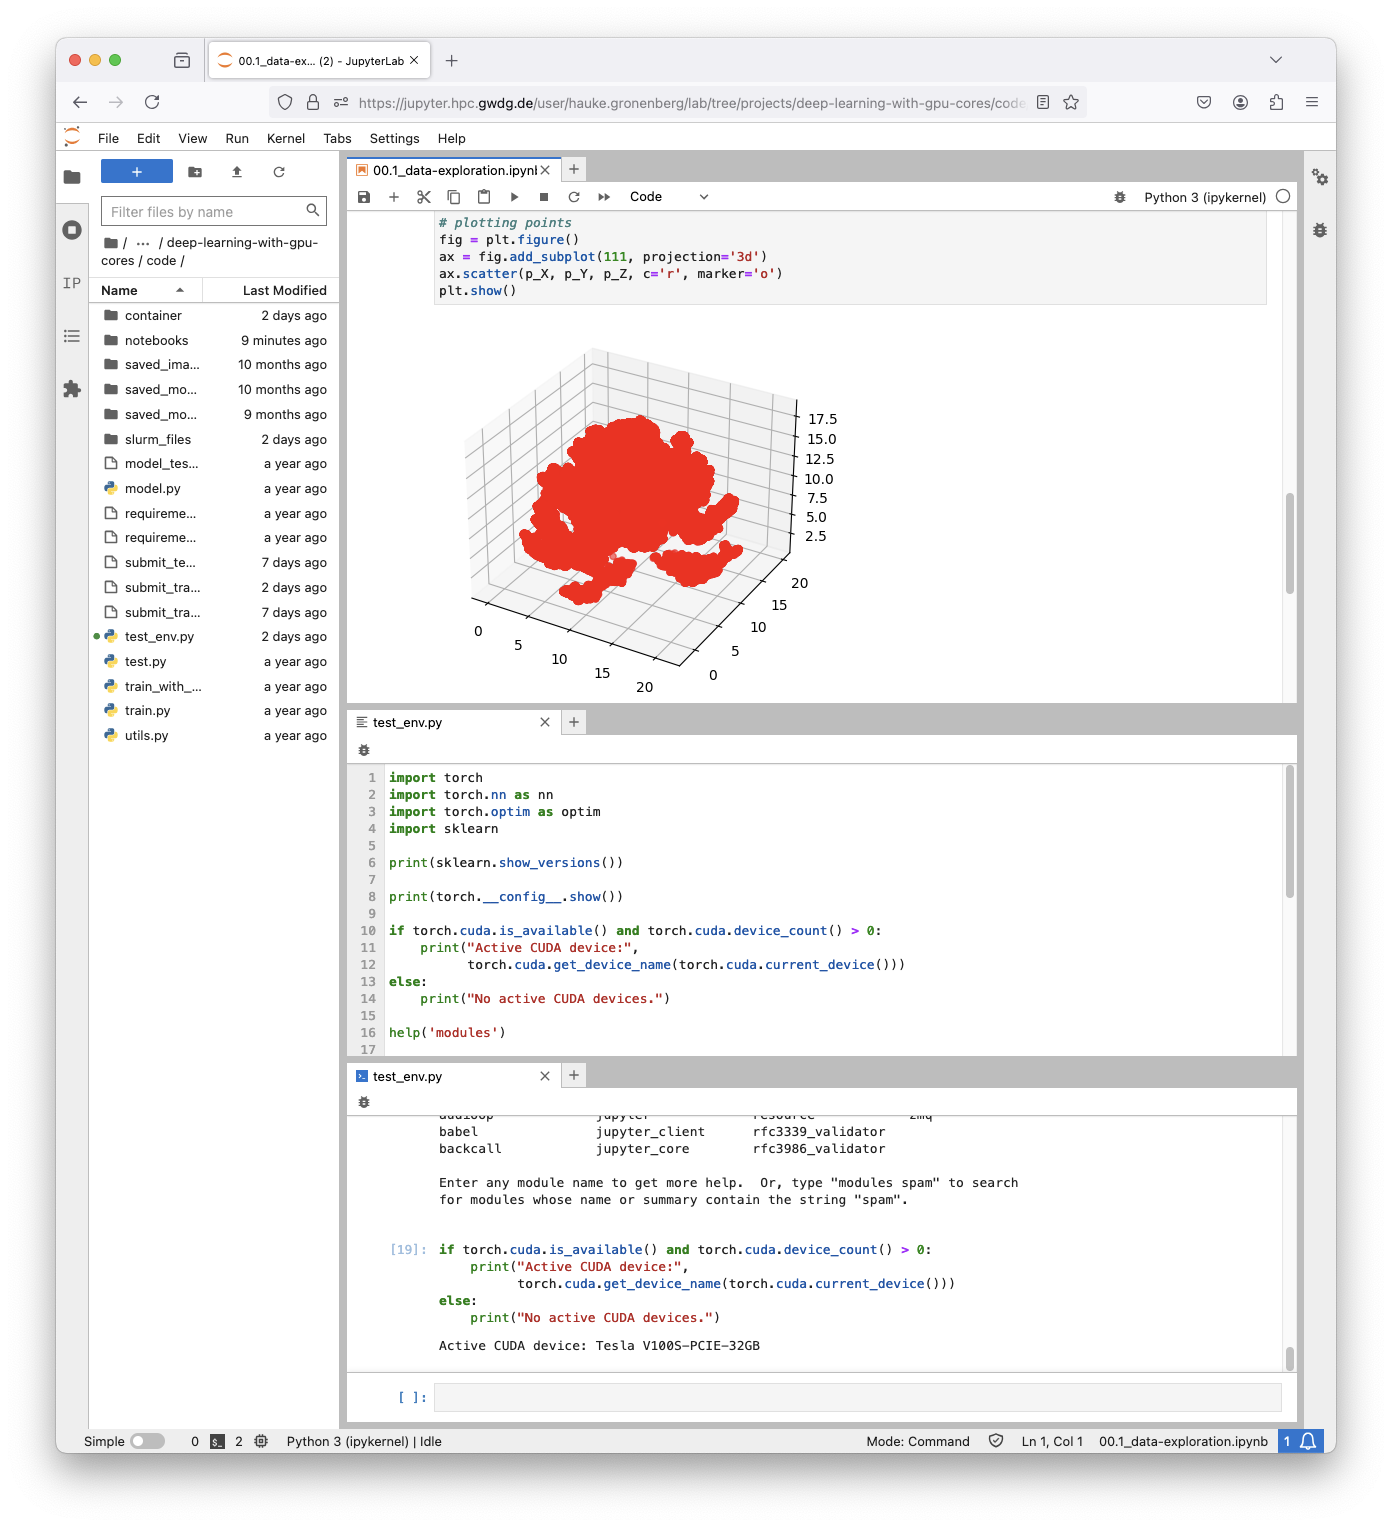
Using the container on HPC JupyterHub
Below are two examples of how to use HPC JupyterHub. The first example shows the use of a JupyterNotebook for data exploration. The second example is about testing the software environment to ensure that everything is set up correctly, e.g. CUDA for GPU acceleration.
Using the container via CLI on the HPC
The full potential of an HPC cluster can only be utilised using the command line interface (CLI). Workflows can be optimized for the available hardware, such as different accelerators (e.g. GPUs, NPU, …) and highly parallel workflows. Here a simple workflow using our workshops example is shown, based on the same container, that was used in JupyterHub. For more details please have a look at our documentation, e.g. on Slurm/GPU Usage and GPU Partitions.
Interactive HPC usage
Using an HPC cluster interactively gives you direct access to the cluster’s compute resources. This can be particularly useful for optimising your workflow on the HPC. For the interactive usage first the compute ressources are requested (salloc). On the requested compute node, a shell is started within the container, allowing code to be executed with the pre-built software environment. In this example, the software environment is tested to make sure that everything works as intended, such as the correct use of CUDA for GPU acceleration (test_env.py).
cd path/to/deep-learning-with-gpu-cores/code/

# get available GPUs with (see docs.hpc.gwdg.de/usage_guide/slurm/gpu_usage/)
# sinfo -o "%25N  %5c  %10m  %32f  %10G %18P " | grep gpu

salloc -t 01:00:00 -p grete:interactive -N1 -G 3g.20gb

module load apptainer

apptainer exec --nv --bind /scratch dlc.sif bash

python ../test_env.py
HPC usage via batch scripts
Finally, the defined workflow can be submitted as a job to the workload manager SLURM. To do this, a job script needs to be defined and submitted via sbatch. As you already have a lot of experience with the containerised software environment, starting on your local machine and JupyterHub, a major point of failure when scaling up your analysis and moving to HPC systems has become unlikely.
sbatch path/to/deep-learning-with-gpu-cores/code/submit_train_dlc.sh
Author
This article was first published in scope of the workshop Deep learning with GPU cores.